Striking a crow pose feels like a major milestone until gravity abruptly invites you face-first into your mat. Sticking the landing requires physics and bone stacking over pure upper body strain. Mastering how to hold crow pose longer balance tips transforms an intimidating arm balance into a sustainable, floating shape.
When you first step onto the mat, inversions and arm balances look like magic tricks performed by people with supernatural strength. Yet, if you watch advanced practitioners hold Bakasana for thirty seconds or a minute, you notice something striking: they are not shaking. Their muscles are not bulging with frantic strain. Instead, they look calm, compact, and almost weightless.
Mastering the Gaze and Upper Body Mechanics
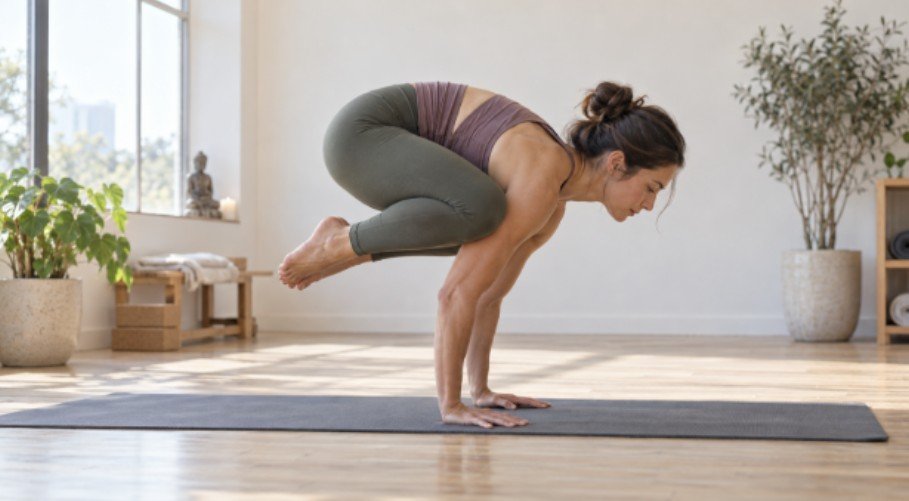
Your focal point dictates your center of gravity. Shifting your gaze forward instead of staring straight down prevents your torso from tipping toward the floor.
When you practice arm balances, your nervous system relies heavily on visual feedback to understand your spatial orientation. Staring directly between your feet or looking back at your heels sends a neurological signal to your brain that you are heading downward. Your torso naturally follows your eyes.
By forcing your gaze forward—about six to twelve inches ahead of your fingertips—you shift the entire trajectory of your upper body. This subtle adjustment realigns your cervical spine, which in turn unlocks your thoracic mobility and prevents your chest from collapsing.
Building a Stable Arm Shelf
Bending your elbows straight back mimics chaturanga alignment rather than letting them flare outward. High placement of your knees into your armpits creates a solid skeletal shelf. This technique relies on bone structure rather than brute muscle fatigue.
When your elbows flare out to the sides, your knees tend to slide down your biceps, forcing your shoulder joints to do all the heavy lifting. By keeping your elbows tracking directly over your wrists, you create vertical pillars of bone.
When you wedge your shins or knees high up into your armpits, your legs rest directly on your upper arms. Your skeletal system bears the load, preserving your muscular endurance for a much longer hold.
Protracting the Shoulders
Pressing the floor away domes your upper back. This shoulder protraction creates an upward lifting sensation, heavily researched in movement science publications like Yoga Journal. Before attempting these balances, incorporate specific yoga poses to strengthen wrist and forearms to protect your joints from sudden impact.
Slumping your chest between your shoulder blades turns your upper body into a hammock, forcing your pectoral muscles and biceps to strain against your bodyweight. Actively rounding your upper back—a motion known as scapular protraction—engages your serratus anterior muscles. This action acts like an internal winch, lifting your torso away from the floor and generating the buoyancy required for a sustained arm balance.
Core Compression and Lower Body Integration
Lifting your bodyweight requires more than arm strength. It demands deep internal compression to shorten your physical levers.
Physics teaches us that longer levers require more torque to lift and stabilize. In human anatomy, your legs act as long levers that pull your center of gravity downward. To neutralize this effect, you must draw your lower body inward toward your core center, transforming your body from a loose collection of limbs into a unified, dense package.
Squeezing the Midline
Passive resting on your arms causes the pose to slip. Active engagement of your inner thighs toward your midline centralizes your mass.
If your knees rest passively on your triceps, they will inevitably slide outward as your sweat or fatigue sets in. Squeezing your inner thighs inward against your outer arms creates friction and compresses your center of gravity. This inward squeeze recruits your adductors and lower abdominals, creating a powerful locking mechanism that anchors your legs to your torso.
Lifting Heels to Glutes
Dragging your heels upward toward your buttocks alters your physics. Squeezing your big toes together shrinks your overall shape, elevating your center of gravity.
Leaving your feet hanging low behind you creates dead weight that pulls you forward out of the pose. The moment your toes leave the mat, your primary goal is to snap your heels directly toward your glutes.
Squeezing your big toes together completes the circuit. This action shortens your physical leverage, making it exponentially easier to balance on your hands for extended durations.
Micro-Adjustments and Finger Braking
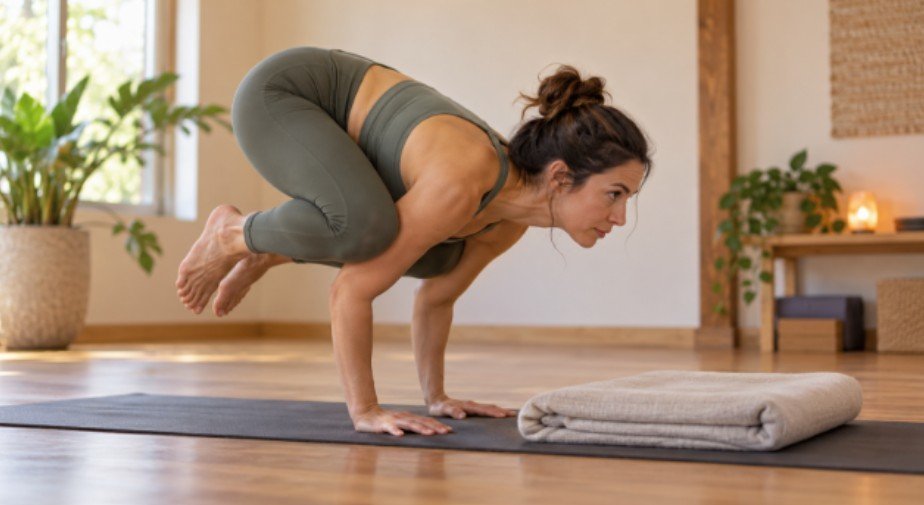
Losing your balance forward usually triggers panic. Experienced practitioners treat their hands like steering wheels.
Maintaining a static position in an arm balance is a myth; true balance is actually a series of micro-corrections happening dozens of times per second. If you treat your hands like rigid blocks, any minor shift in your weight will send you tumbling.
Developing better control during transitions can also help you understand how to transition from Warrior 1 to Warrior 2 while maintaining balance and coordinated movement.
Hasta Bandha Action
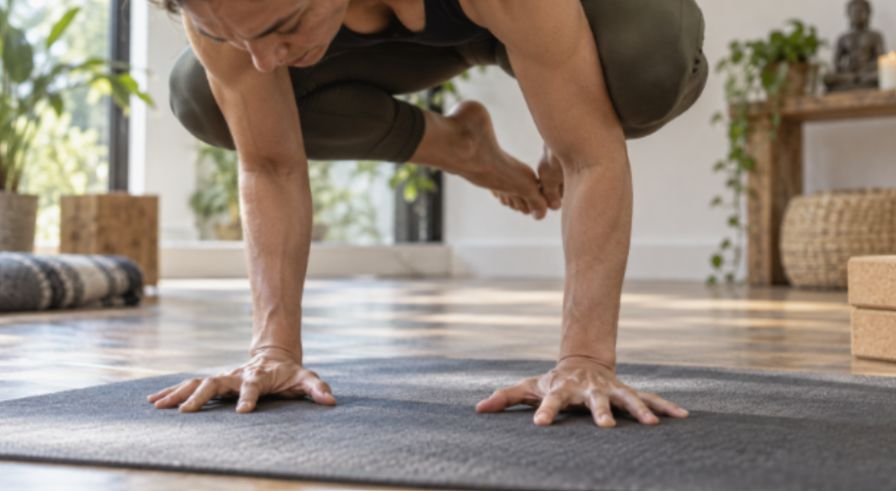
Spreading your fingers wide and clawing the mat acts as a braking system. Pressing into your fingertips shifts your weight backward whenever you drift too far past your wrists.
Your hands are your primary interface with the earth. Spreading your fingers wide distributes your body weight across a broader surface area, protecting your carpal tunnels and joints.
Actively gripping the floor with your fingertips—known in Sanskrit as Hasta Bandha—gives you active control over your momentum. If you feel yourself tipping past your fingertips toward a forward roll, pressing down firmly into your finger pads pushes your weight backward, restoring equilibrium instantly.
Core-to-Floor Integration
Drawing your navel tightly toward your spine bridges your upper and lower halves. For complementary mobility work that protects your spine after intense arm balancing, review routines focused on safe backbending yoga.
Your deep transverse abdominis muscles act as a natural weightlifting belt. Sucking your belly button up and in creates intra-abdominal pressure that stabilizes your lumbar spine. This core connection prevents your hips from sagging and links your upper body foundation seamlessly with your lower body leverage.
Frequently Asked Questions
1. How do I stop falling forward in Crow Pose?
I practice with a cushion in front of me, keep my gaze slightly ahead of my hands, and shift forward slowly. If I begin to tip, pressing into my finger pads often helps me steady myself.
2. Should I straighten my arms?
I keep my elbows bent for the version of Crow Pose I practice. Straightening the arms is a more demanding variation, and I do not treat it as a requirement for holding Crow longer.
3. What if I cannot lift both feet?
I lift one foot while keeping the other toes lightly on the floor. That lets me practice the weight shift without rushing into a full balance.
4. How can I hold Crow Pose longer?
For me, the most useful how to hold crow pose longer balance tips are to look forward, press the floor away, draw my feet in, and use my fingertips for small corrections. I build time a breath at a time.
Conclusion
My Crow Pose improved when I stopped measuring every attempt by how long I stayed in the air. A controlled lift and landing taught me more than a panicked five-second hold.
I still wobble, but now I know what to adjust: my gaze, the pressure in my hands, or the position of my feet. On my next attempt, I aim for one steady breath more.