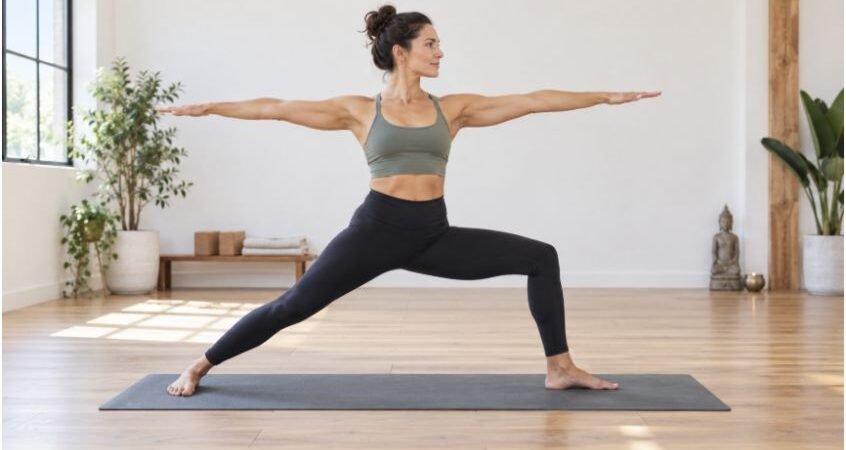
Twisting your pelvis open from Warrior 1 to Warrior 2 without moving your feet is a fast track to knee injury. As a yoga teacher who has watched countless students grind their lower backs and joints by forcing a static stance, I can tell you that mechanics matter. Warrior 1 is a closed-hip posture facing the front of your mat, while Warrior 2 is an open-hip posture facing the side. Bridging this gap requires an intentional mechanical reset.
The Mechanical Trap of Fixed Feet
Keeping your feet locked in place during this sequence creates dangerous rotational torque. When your back foot remains at a fixed 45-degree angle while your chest faces the side, your back knee and sacroiliac joint absorb the shearing force.
Traditional lineages like iyengar yoga emphasize precise external rotation and joint stacking to prevent this exact wear and tear. Protecting your body means shifting from hip-width railroad tracks to a heel-to-arch alignment that respects your skeletal geometry.
Step-by-Step Blueprint for a Seamless Flow
Grounding in Warrior 1
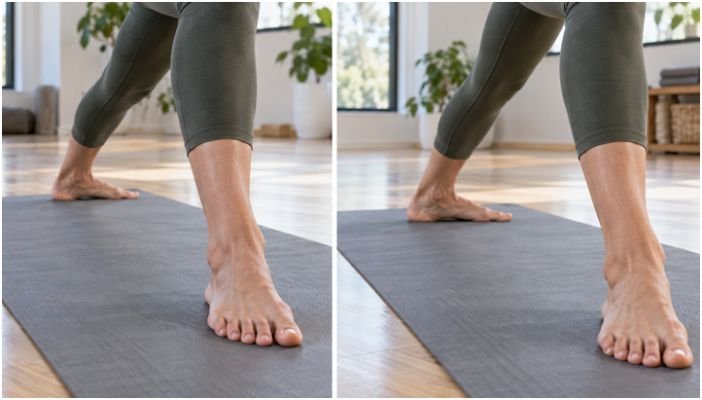
Begin with your front knee stacked over your ankle at a 90-degree angle. Your back foot stays anchored at 45 degrees, and your hips square forward. If you want to build deep hip mobility before exploring these standing sequences, incorporating targeted hip opening yoga sequences into your weekly practice will make the transition effortless.
Unlocking the Back Foot
As you exhale, lift your back heel slightly or pivot on the ball of your foot. This simple weight shift eliminates friction and protects your meniscus. Rotate your back foot so it is nearly parallel to the back edge of your mat, targeting a 75- to 90-degree angle.
Adjusting Stance and Arms
Heel-toe your back foot slightly wider to transition from railroad tracks to a heel-to-arch alignment. Simultaneously, spin your chest and pelvis open toward the long edge of the mat. Sweep your arms down from overhead into a wide horizontal “T” shape, stacking your shoulders directly over your pelvis.
How do I move from Warrior 2 into Reverse Warrior without losing my front lunge?
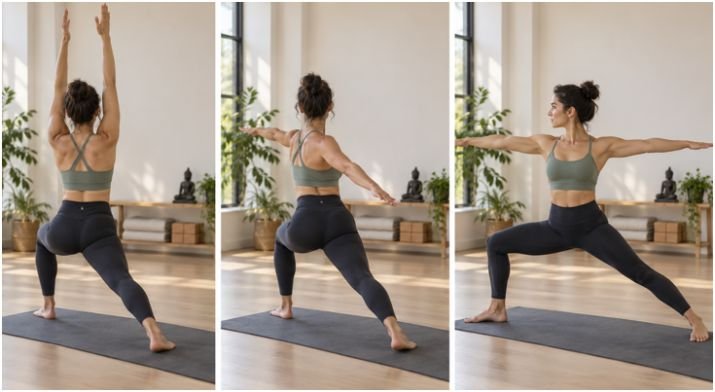
Moving from Warrior 2 into Reverse Warrior without losing your front lunge is all about torso isolation. The most common mistake is straightening or shifting the front leg as you reach backward, which collapses the front quadriceps and sacrifices the depth of your pose.
Step-by-Step Transition
1. Lock in the Lower Body First: Before your upper body moves an inch, anchor your front foot, keep your front knee stacked directly over your ankle at 90 degrees, and press firmly into the outer edge of your back foot. Remind yourself that the lower half of your body stays completely frozen in Warrior 2 position.
2. Flip the Front Palm: As you inhale, turn your front palm to face the ceiling. Keeping your front arm straight or with a micro-bend in the elbow, begin to sweep that arm up and overhead.
3. Slide the Back Hand Down: Rest your back hand lightly on your back thigh, calf, or wrap it gently behind your lower back. Avoid dumping your body weight onto your back leg; use your core strength to support the lift.
4. Lean from the Ribcage, Not the Waist: Instead of crunching your lower back or collapsing sideways, imagine lifting your front ribs up and away from your hip points. Reach your top fingertips back toward the wall behind you.
5. Maintain Front Knee Tracking: As you reach back, check your front knee. It frequently wants to drift forward past the ankle or collapse inward. Keep it actively tracking open toward your second and third toes.
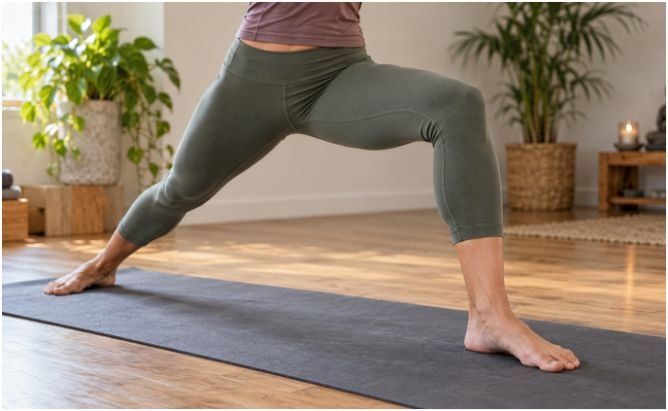
6. Keep Your Gaze Soft: Gaze up toward your top hand, or keep your neck neutral and look down toward your back foot if looking upward strains your neck.
Common Pitfalls to Avoid
- Straightening the Front Leg: Bending backward often tricks your brain into standing up. Fight this urge by intentionally dropping your tailbone slightly and sinking deeper into your front hip crease.
- Leaning Too Much Weight on the Back Hand: Your back hand is a gentle guide, not a kickstand. If you lift your back hand off your leg and your torso collapses, you are relying too much on the back support rather than your core.
Frequently Asked Questions
1. Why does my front knee hurt during the transition?
Your knee likely caved inward (valgus collapse); actively track it toward your pinky toe.
2. Can I keep my back foot flat while turning?
No, keeping the back foot flat at 45 degrees while opening the hips strains the knee and ankle joints.
3. How wide should my stance be?
Your front heel should intersect directly with the arch of your back foot.
4. Where should my gaze be focused?
Soften your shoulders and fix your gaze past your front middle finger.
Conclusion: Stop Stomping, Start Pivoting
Mastering this transition is less about strength and more about respecting joint angles. Treat your mat like a dance floor rather than a concrete slab. Next time you flow, keep that back heel light, honor your alignment, and watch your practice transform