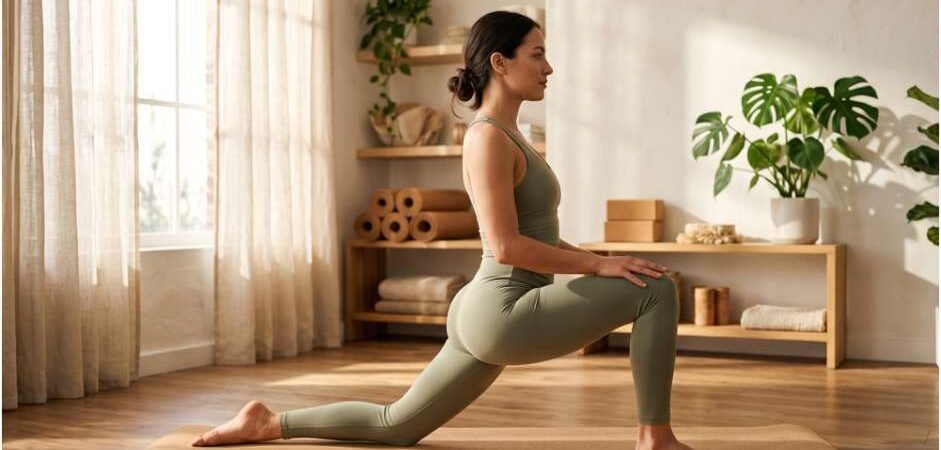
Years of marathon training and ten-hour days at a desk left my pelvis feeling like rusted iron. Every forward fold pulled at my lower back, and standard stretches aggravated my knees. Practicing this targeted hip opening yoga sequence for tight hips completely resolved that chronic stiffness by prioritizing joint safety, reciprocal inhibition, and active stabilization.
If you spend your days seated, your hips do not just lose flexibility—they lose functional range of motion. Forcing deep shapes only causes surrounding tendons to compensate. This routine systematically restores pelvic freedom while keeping your knees and lumbar spine protected.
The Biomechanics of Why Sitting Locks Your Pelvis
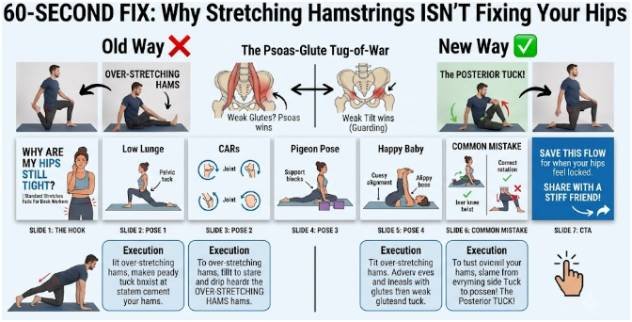
Sitting places your hip joints in chronic passive flexion. Over time, the hip flexor complex—primarily the psoas major and rectus femoris—shortens and stays chemically locked. Research from Harvard Health Publishing demonstrates how prolonged seated posture weakens the posterior chain, tilts the pelvis forward, and pulls the lumbar spine into excessive lordosis.
When your pelvis tilts forward, your hamstring attachments pull taut. People often mistake this tension for tight hamstrings and stretch them aggressively. That approach fails because the root culprit sits directly on the opposite side: a guarded, hypertonic hip flexor.
Stop Stretching the Wrong Muscles: The Psoas-Glute Tug of War
The body operates on reciprocal inhibition. When your hip flexors fire or remain locked short, the brain automatically dampens nerve signals to your gluteus maximus, a concept detailed by the American Council on Exercise (ACE).
Prolonged Sitting ➔ Shortened Psoas ➔ Inhibited Glutes ➔ Anterior Pelvic Tilt ➔ Chronic Hip Tightness
To release the front of the pelvis, you must wake up the glutes. Passively wrenching your joints open invites injury. You need active muscle engagement throughout every stage of this sequence.
Phase 1: Mobilize Before You Stabilize
Never enter intense stretches cold. Start on your mat by circulating synovial fluid through the ball-and-socket joint and finding a neutral pelvis.
Pelvic Tilts to Neutralize Lumbar Arching
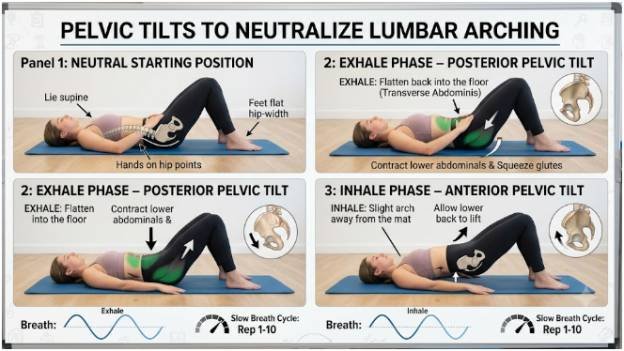
Lie supine with your knees bent and feet hip-width flat on the mat. Place your hands on your hip points. On an exhale, flatten your lower back completely into the floor by contracting your lower abdominals and squeezing your glutes. On an inhale, arch your lower back slightly away from the mat.
Repeat this rocking motion for 10 slow breaths. This simple movement re-establishes neuromuscular control over your pelvic position before you bear load.
Quadruped Hip CARs (Controlled Articular Rotations)
Shift to hands and knees. Keep your spine rigid and your ribs tucked down. Lift your right knee off the floor, keeping the joint bent at 90 degrees:
- Drive the knee forward toward your tricep.
- Abduct the leg out to the side like a fire hydrant, avoiding any spinal twist.
- Rotate the hip internally by turning the sole of your foot toward the ceiling.
- Drive the thigh backward into hip extension, squeezing your glute.
- Bring the knee back down alongside the left knee.
Complete 5 slow circles in each direction on both sides. This dynamic movement sweeps the femur through its entire socket, releasing friction and warming the joint capsule.
Phase 2: Active Opening for Hip Flexors and Adductors
Now that the joint capsule is lubricated, target the anterior chain and the groin.
Low Lunge with Posterior Tuck (Anjaneyasana)
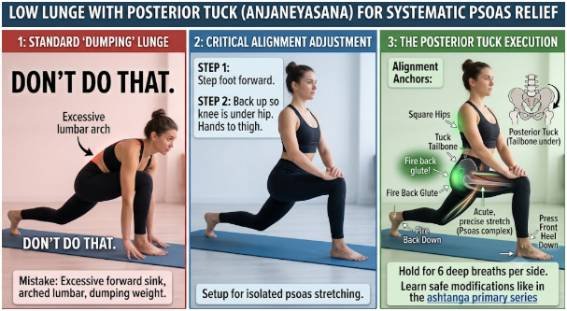
Step your right foot forward between your hands and lower your left knee to the floor. Most yogis sink their hips as low as possible, dumping dead weight into their lumbar spine. Do not do that.
Back your hips up slightly until your back knee rests directly under your left hip. Place your hands on your front thigh. Engage your left glute firmly and tuck your tailbone underneath your pelvis. You will instantly feel an acute, precise stretch down the front of the left thigh and hip crease. Hold for 6 full breaths per side.
Alignment Anchor:
Square your hips ➔ Tuck your tailbone ➔ Fire the back glute ➔ Press the front heel down
Supported Lizard to Three-Legged Transition
From Low Lunge, heel-toe your right foot out to the edge of your mat. Bring both palms inside the front foot. Keep your back knee down for deep groin release, or lift it to fire the quadriceps.
To take pressure off tight hamstrings and maintain spinal length, you can use yoga blocks in downward dog before transitioning your hands to the floor. Hold Lizard for 5 deep cycles of breath, keeping your right knee hugged close to your right shoulder.
Step back into Downward-Facing Dog, kick your right leg high, bend the knee, and stack the right hip over the left. Keep both shoulders level with the floor to isolate the stretch along the right side-body and lateral hip.
Grounded Yogi Squat (Malasana)
Step your feet out to the wide edges of your mat, pointing your toes outward roughly 45 degrees. Drop your hips into a deep squat.
If your heels lift, slide a rolled blanket under them or sit onto a block. Press your elbows against the insides of your knees and draw your palms to heart center. Lengthen the crown of your head toward the ceiling. Malasana widens the pelvic outlet, stretches the adductor group, and decompresses lower back tissue after prolonged sitting.
Phase 3: Decompressing the Deep Rotators Without Knee Torque
The final phase addresses the deep external rotators—including the piriformis, gemelli, and obturator internus. These muscles often pinch the sciatic nerve when tight, a condition documented by the National Center for Biotechnology Information (NCBI).
Supported Pigeon: Stop Sacrificing Your Meniscus
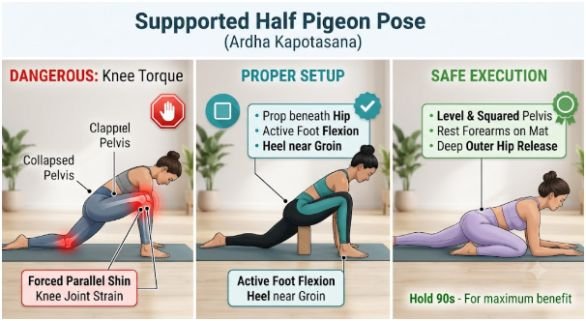
Half Pigeon (Ardha Kapotasana) is famous in the ashtanga primary series, but poor form ruins knee cartilage. When hip external rotation is limited, the knee joint twists to compensate, placing extreme torsional load on the medial collateral ligament and meniscus.
To protect the joint:
- Do not force your front shin parallel to the front of the mat; keep your heel pulled close to your groin.
- Firmly flex your front foot to lock your ankle and stabilize the knee ligaments.
- Place a firm yoga block or folded blanket beneath your front hip bone.
Square your pelvis completely. Only fold forward onto your forearms if your pelvis remains level without leaning toward the hip of your bent leg. Hold for 90 seconds, focusing on smooth exhales.
Supine Bound Angle and Happy Baby
Roll onto your back to finish with passive, traction-based releases:
- Supta Baddha Konasana: Bring the soles of your feet together and let your knees fall open naturally to the sides. Place your hands on your lower abdomen. Allow gravity to draw the thighs downward without pressing on your knees.
- Happy Baby (Ananda Balasana): Draw both knees toward your armpits and grab the outside edges of your feet. Keep your entire sacrum flush against the mat. Pull down gently with your arms while driving your heels up into your hands. Hold for 1 minute.
Common Alignment Mistakes That Sabotage Progress
- Collapsing the Hip in Pigeon: Leaning toward the floor on your bent leg unloads the stretch and torques the knee joint. Use a prop to stay centered.
- Over-arching the Lower Spine in Lunges: Dumping into the lumbar vertebrae bypasses the psoas completely and causes lower back pain. Always tuck your tailbone first.
- Holding Your Breath: Muscle spindles contract when oxygen supply drops or stress hormones spike. Long, slow exhales trigger your parasympathetic nervous system to release tissue guarding.
Unstick Those Joints for Good
Tight hips will not surrender to sheer force; they loosen when you give your nervous system a reason to trust the range of motion. Run through this hip opening yoga sequence for tight hips three to four times a week after a workout or at the end of your workday. Stop treating your pelvis like a stubborn hinge, start respecting your knee alignment, and let structural biomechanics do the heavy lifting for you.
Frequently Asked Questions
1. How often should I practice this hip opening sequence?
Perform this sequence three to four days per week to see consistent mobility gains without fatiguing connective tissue.
2. What should I do if Pigeon Pose hurts my knees?
Switch immediately to Reclined Figure Four on your back, which provides identical outer hip release with zero knee torque.
3. Can tight hips cause persistent lower back pain?
Yes, restricted hip extension forces your lumbar spine to hyper-extend and compensate during walking and standing.
4. Why do my hips feel sore the morning after stretching?
Mild soreness indicates micro-lengthening in tight fascial bands, but sharp pain signals you overstretched past your joint envelope.